
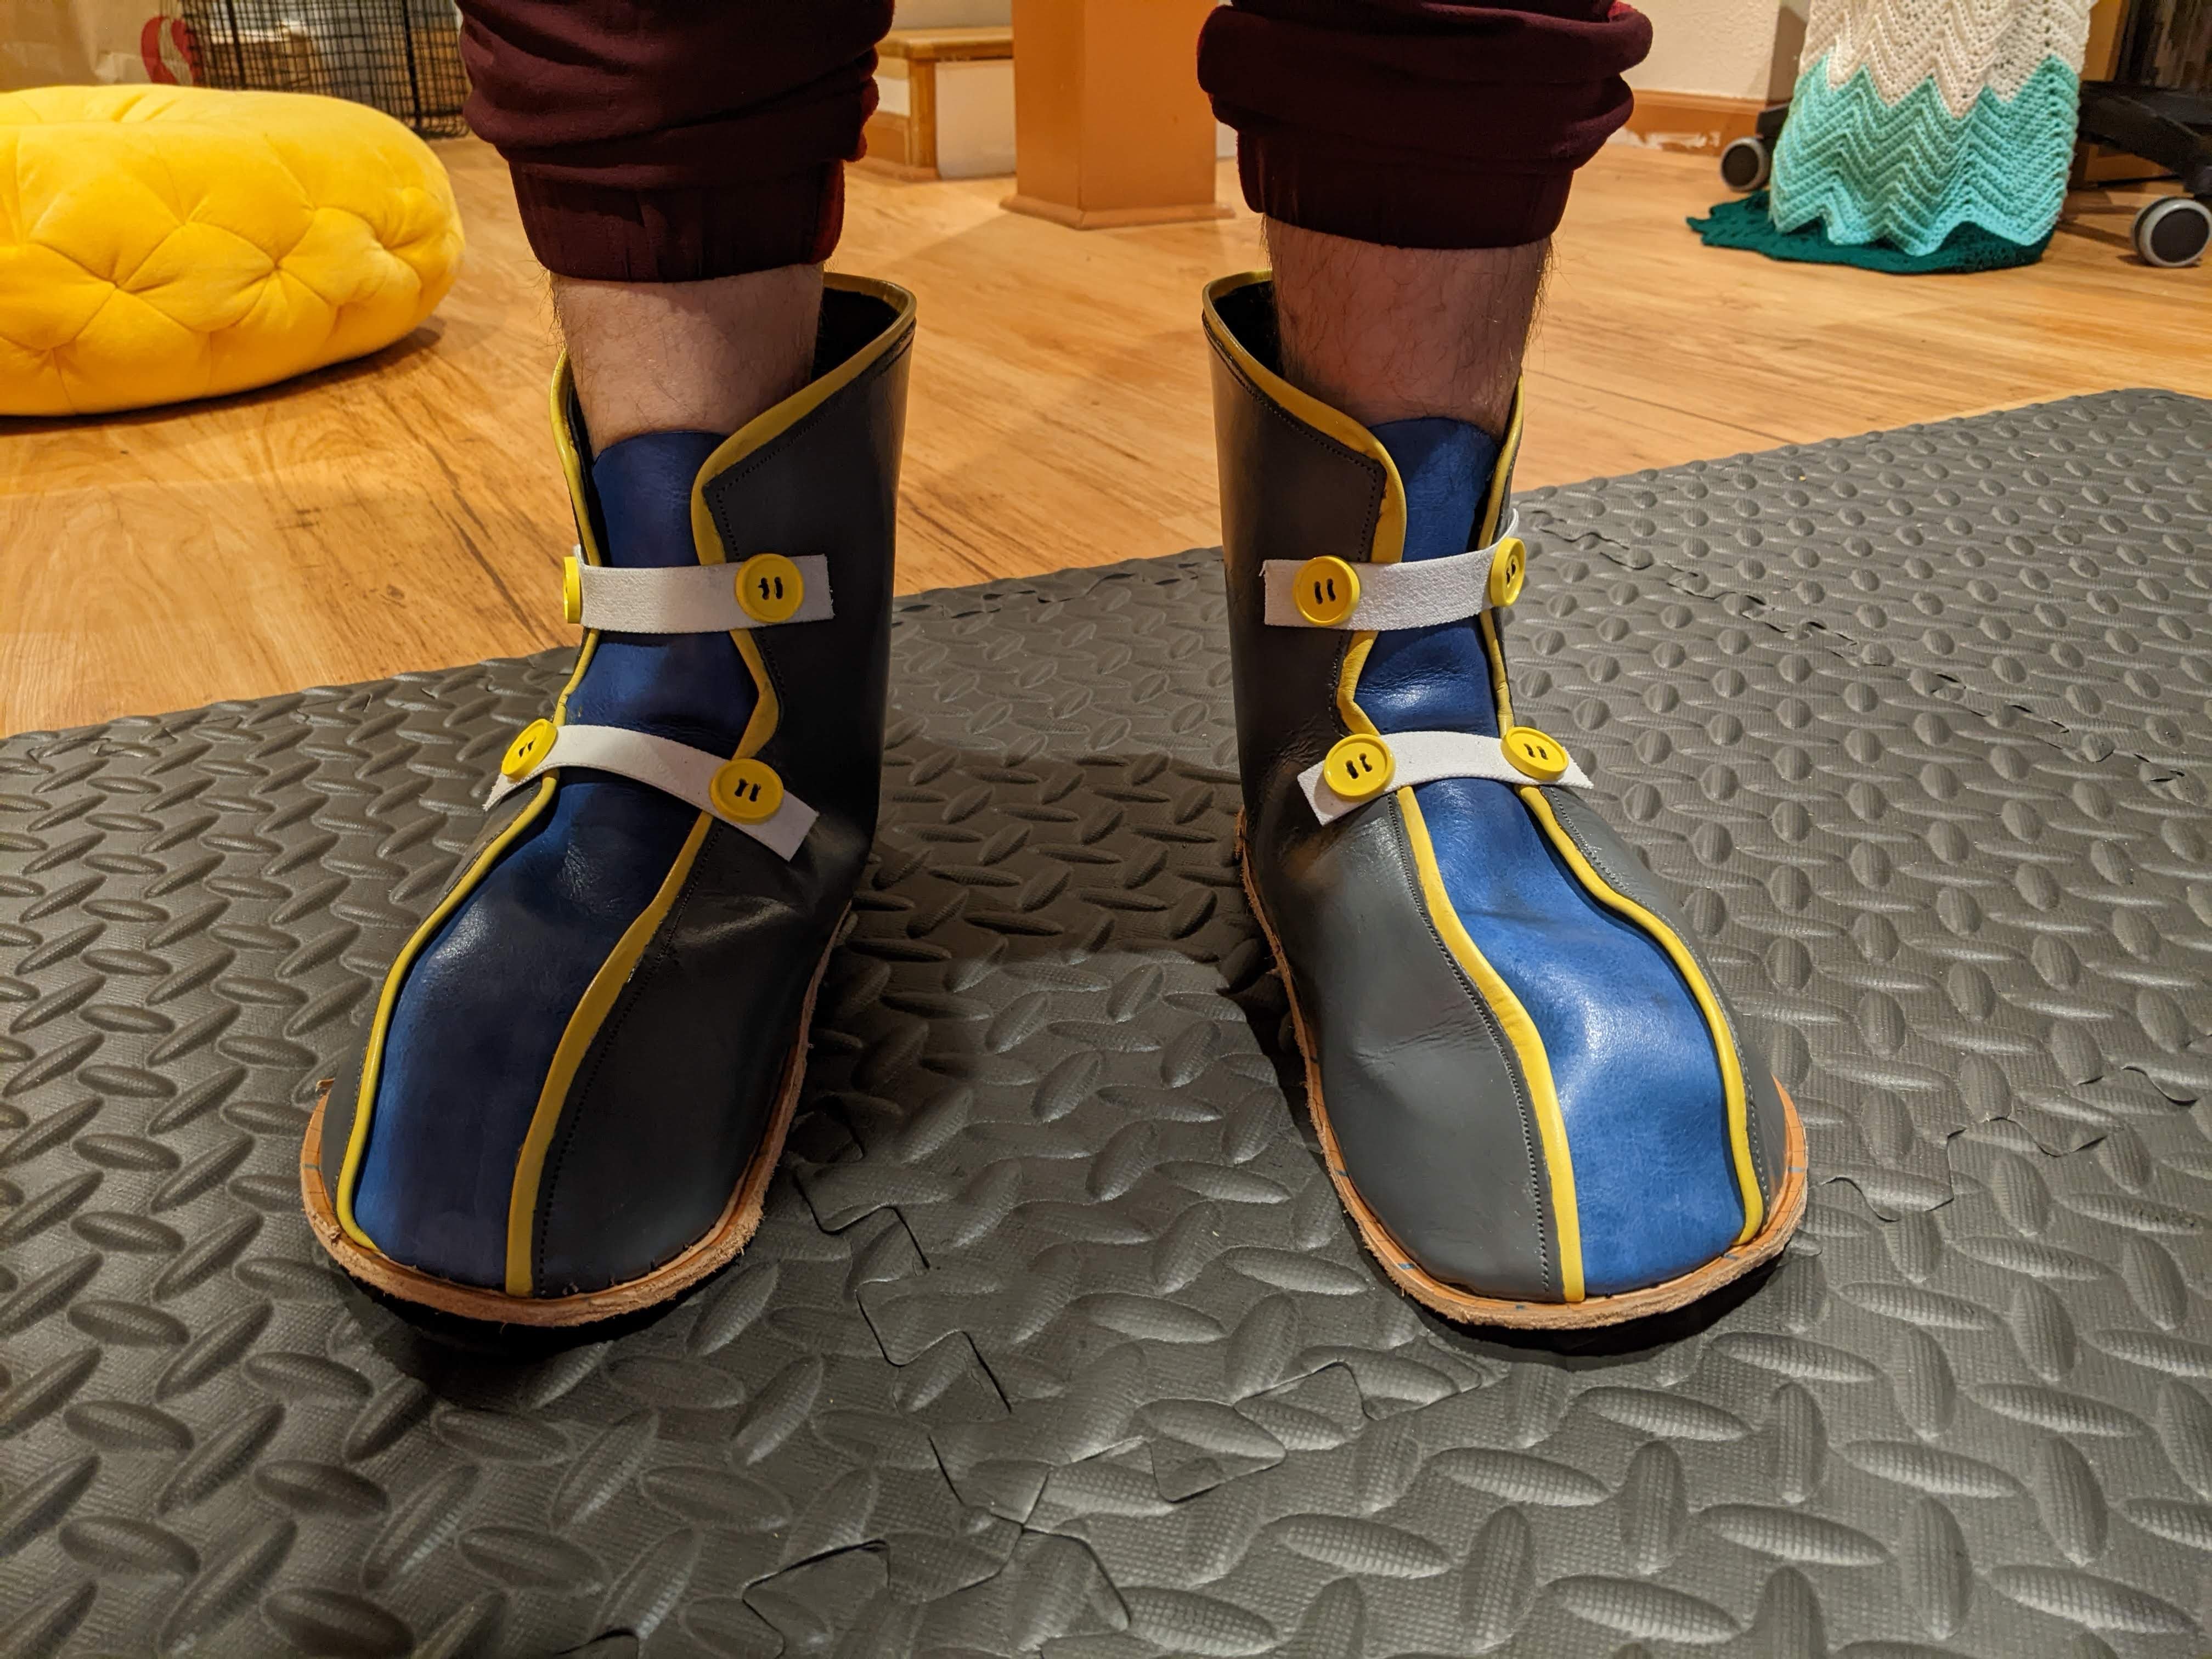
Neku Sakuraba's Boots - Part 2
The World Ends With You
In Part 1 we covered patterning and the assembly of the upper. Now it's time for some sole.
Midsole
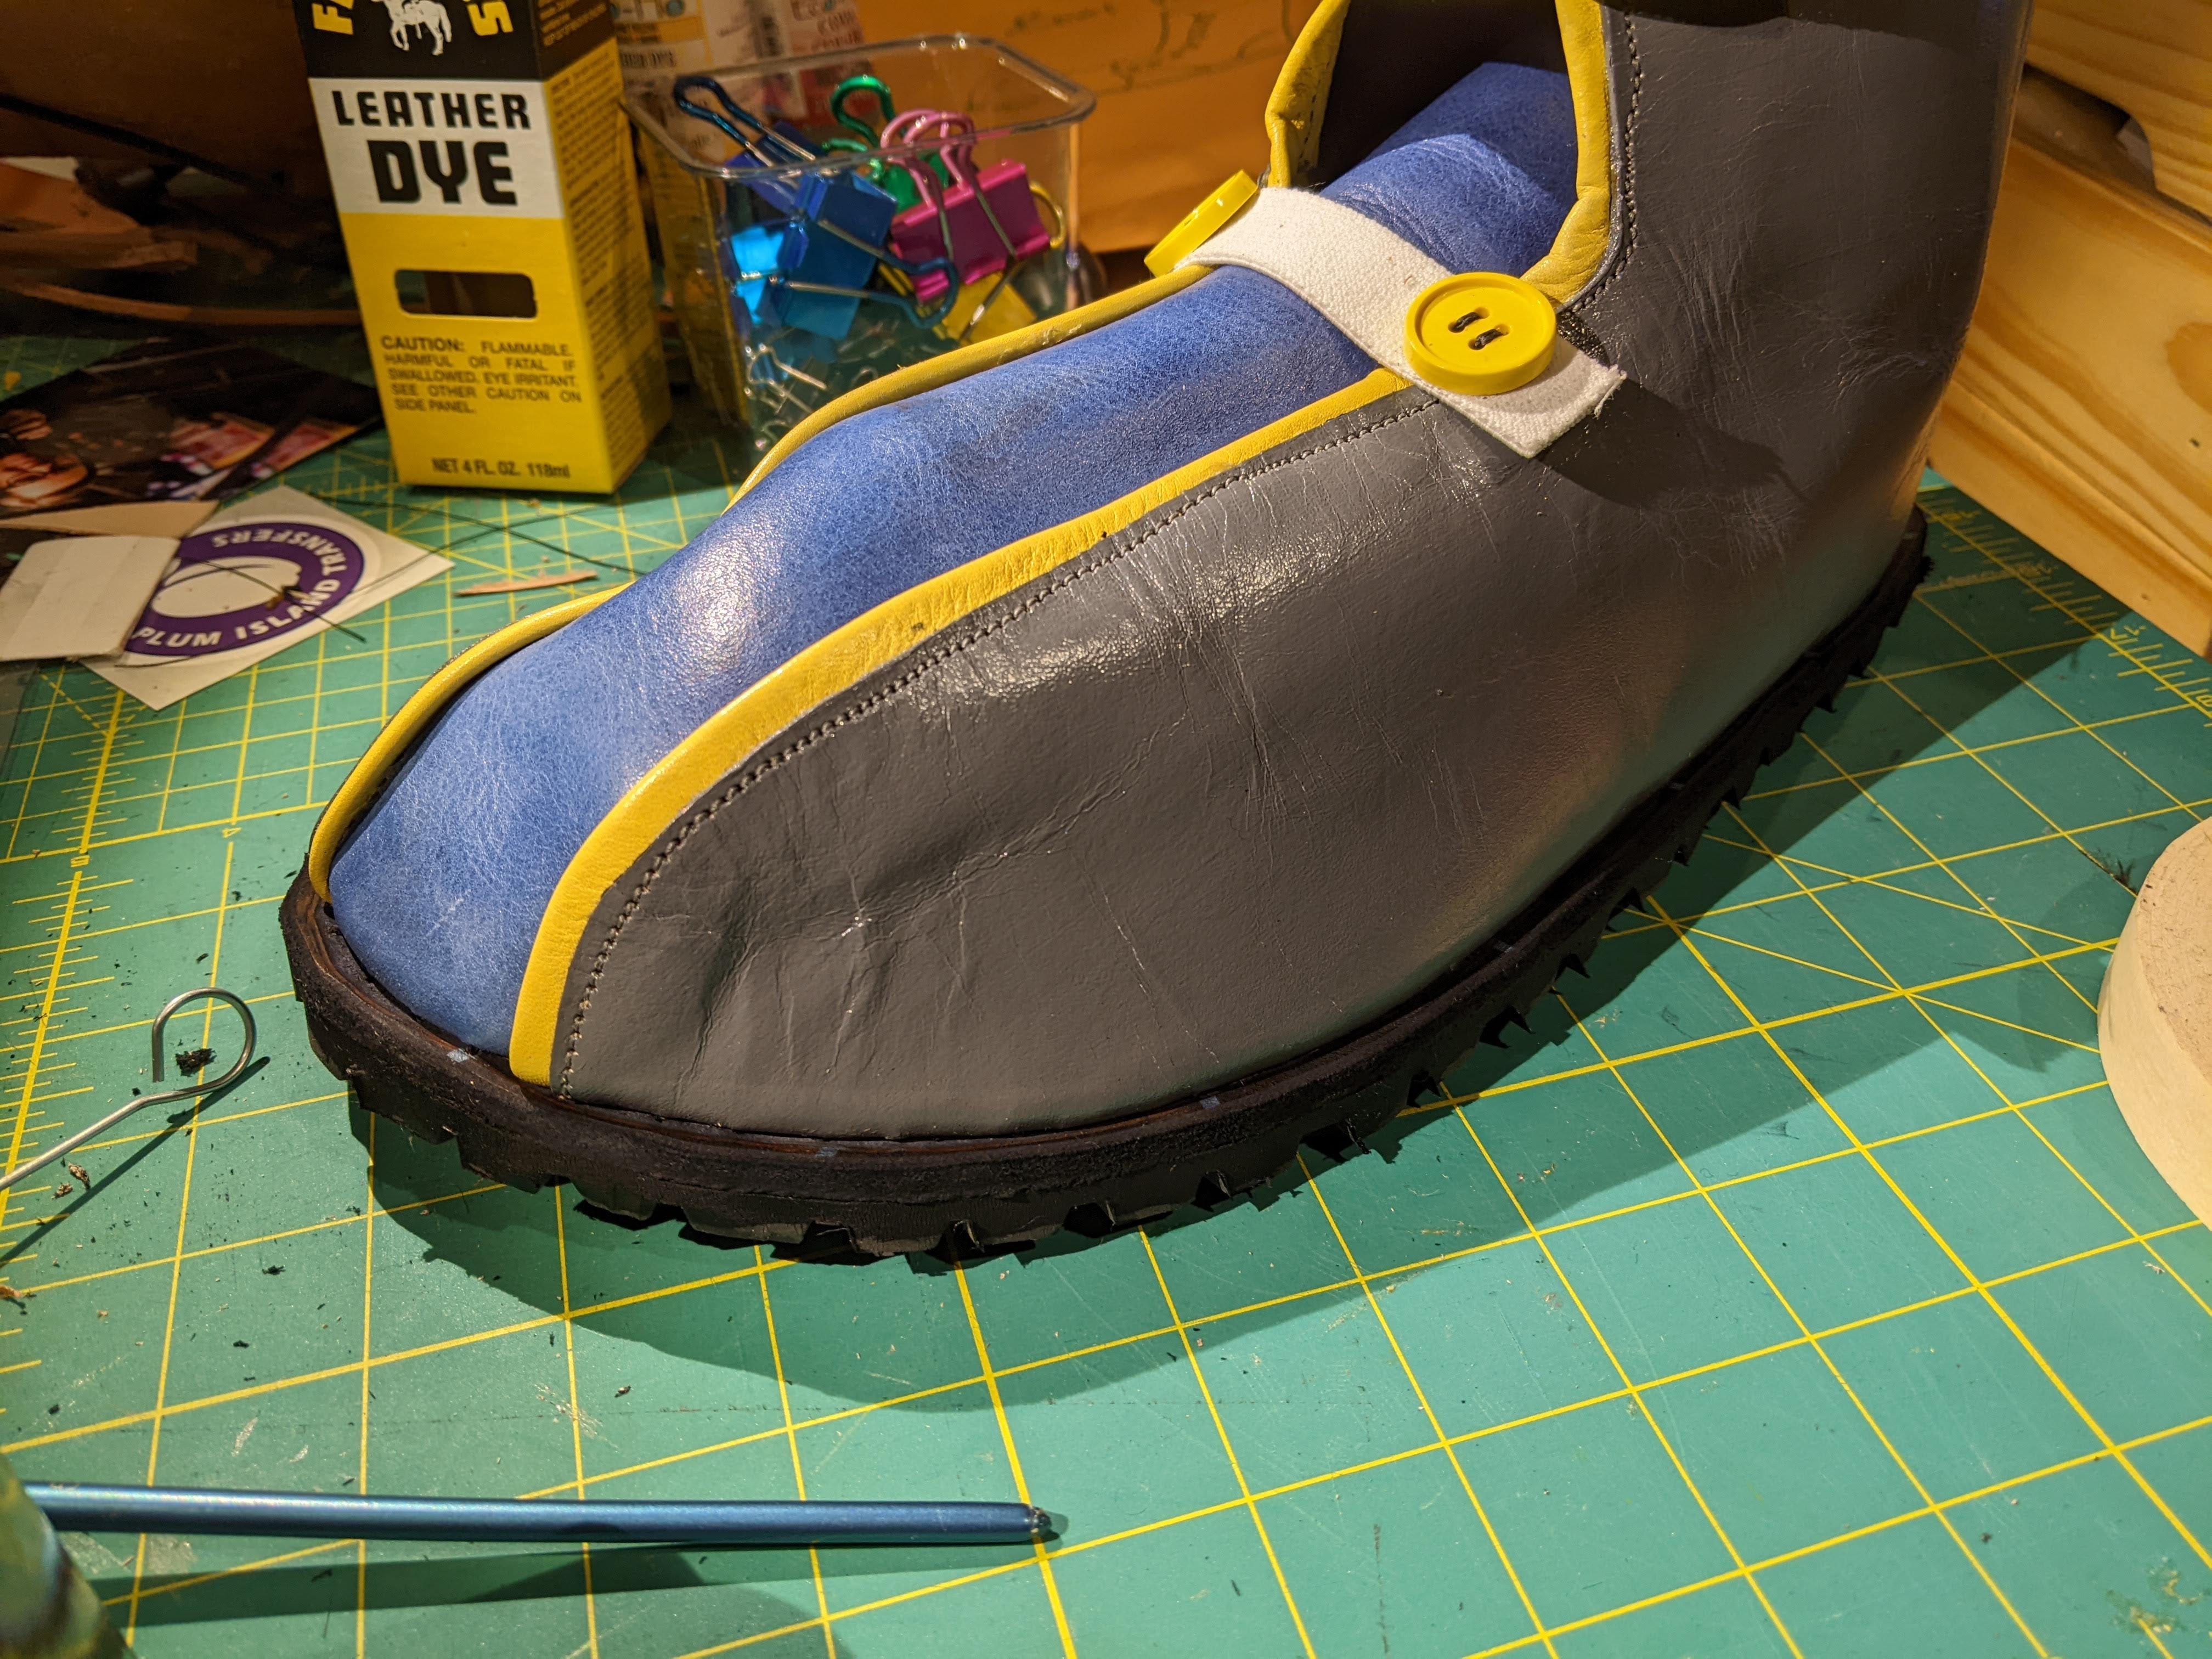
The midsole is cut out of a thick piece of midsole leather. All the marks are transferred and I took a silver sharpie to mark those round punches that were made for every 5th notch. The midsole will get stained black in the end, so don't have to worry about seeing these marks.
About a 1/4" in from the outside edge I cut a channel with a French Edge Skiving tool. This is where the upper will attach so the channel gives is the upper seam allowance somewhere to go and hopefully hide any gaps when you attach the upper.
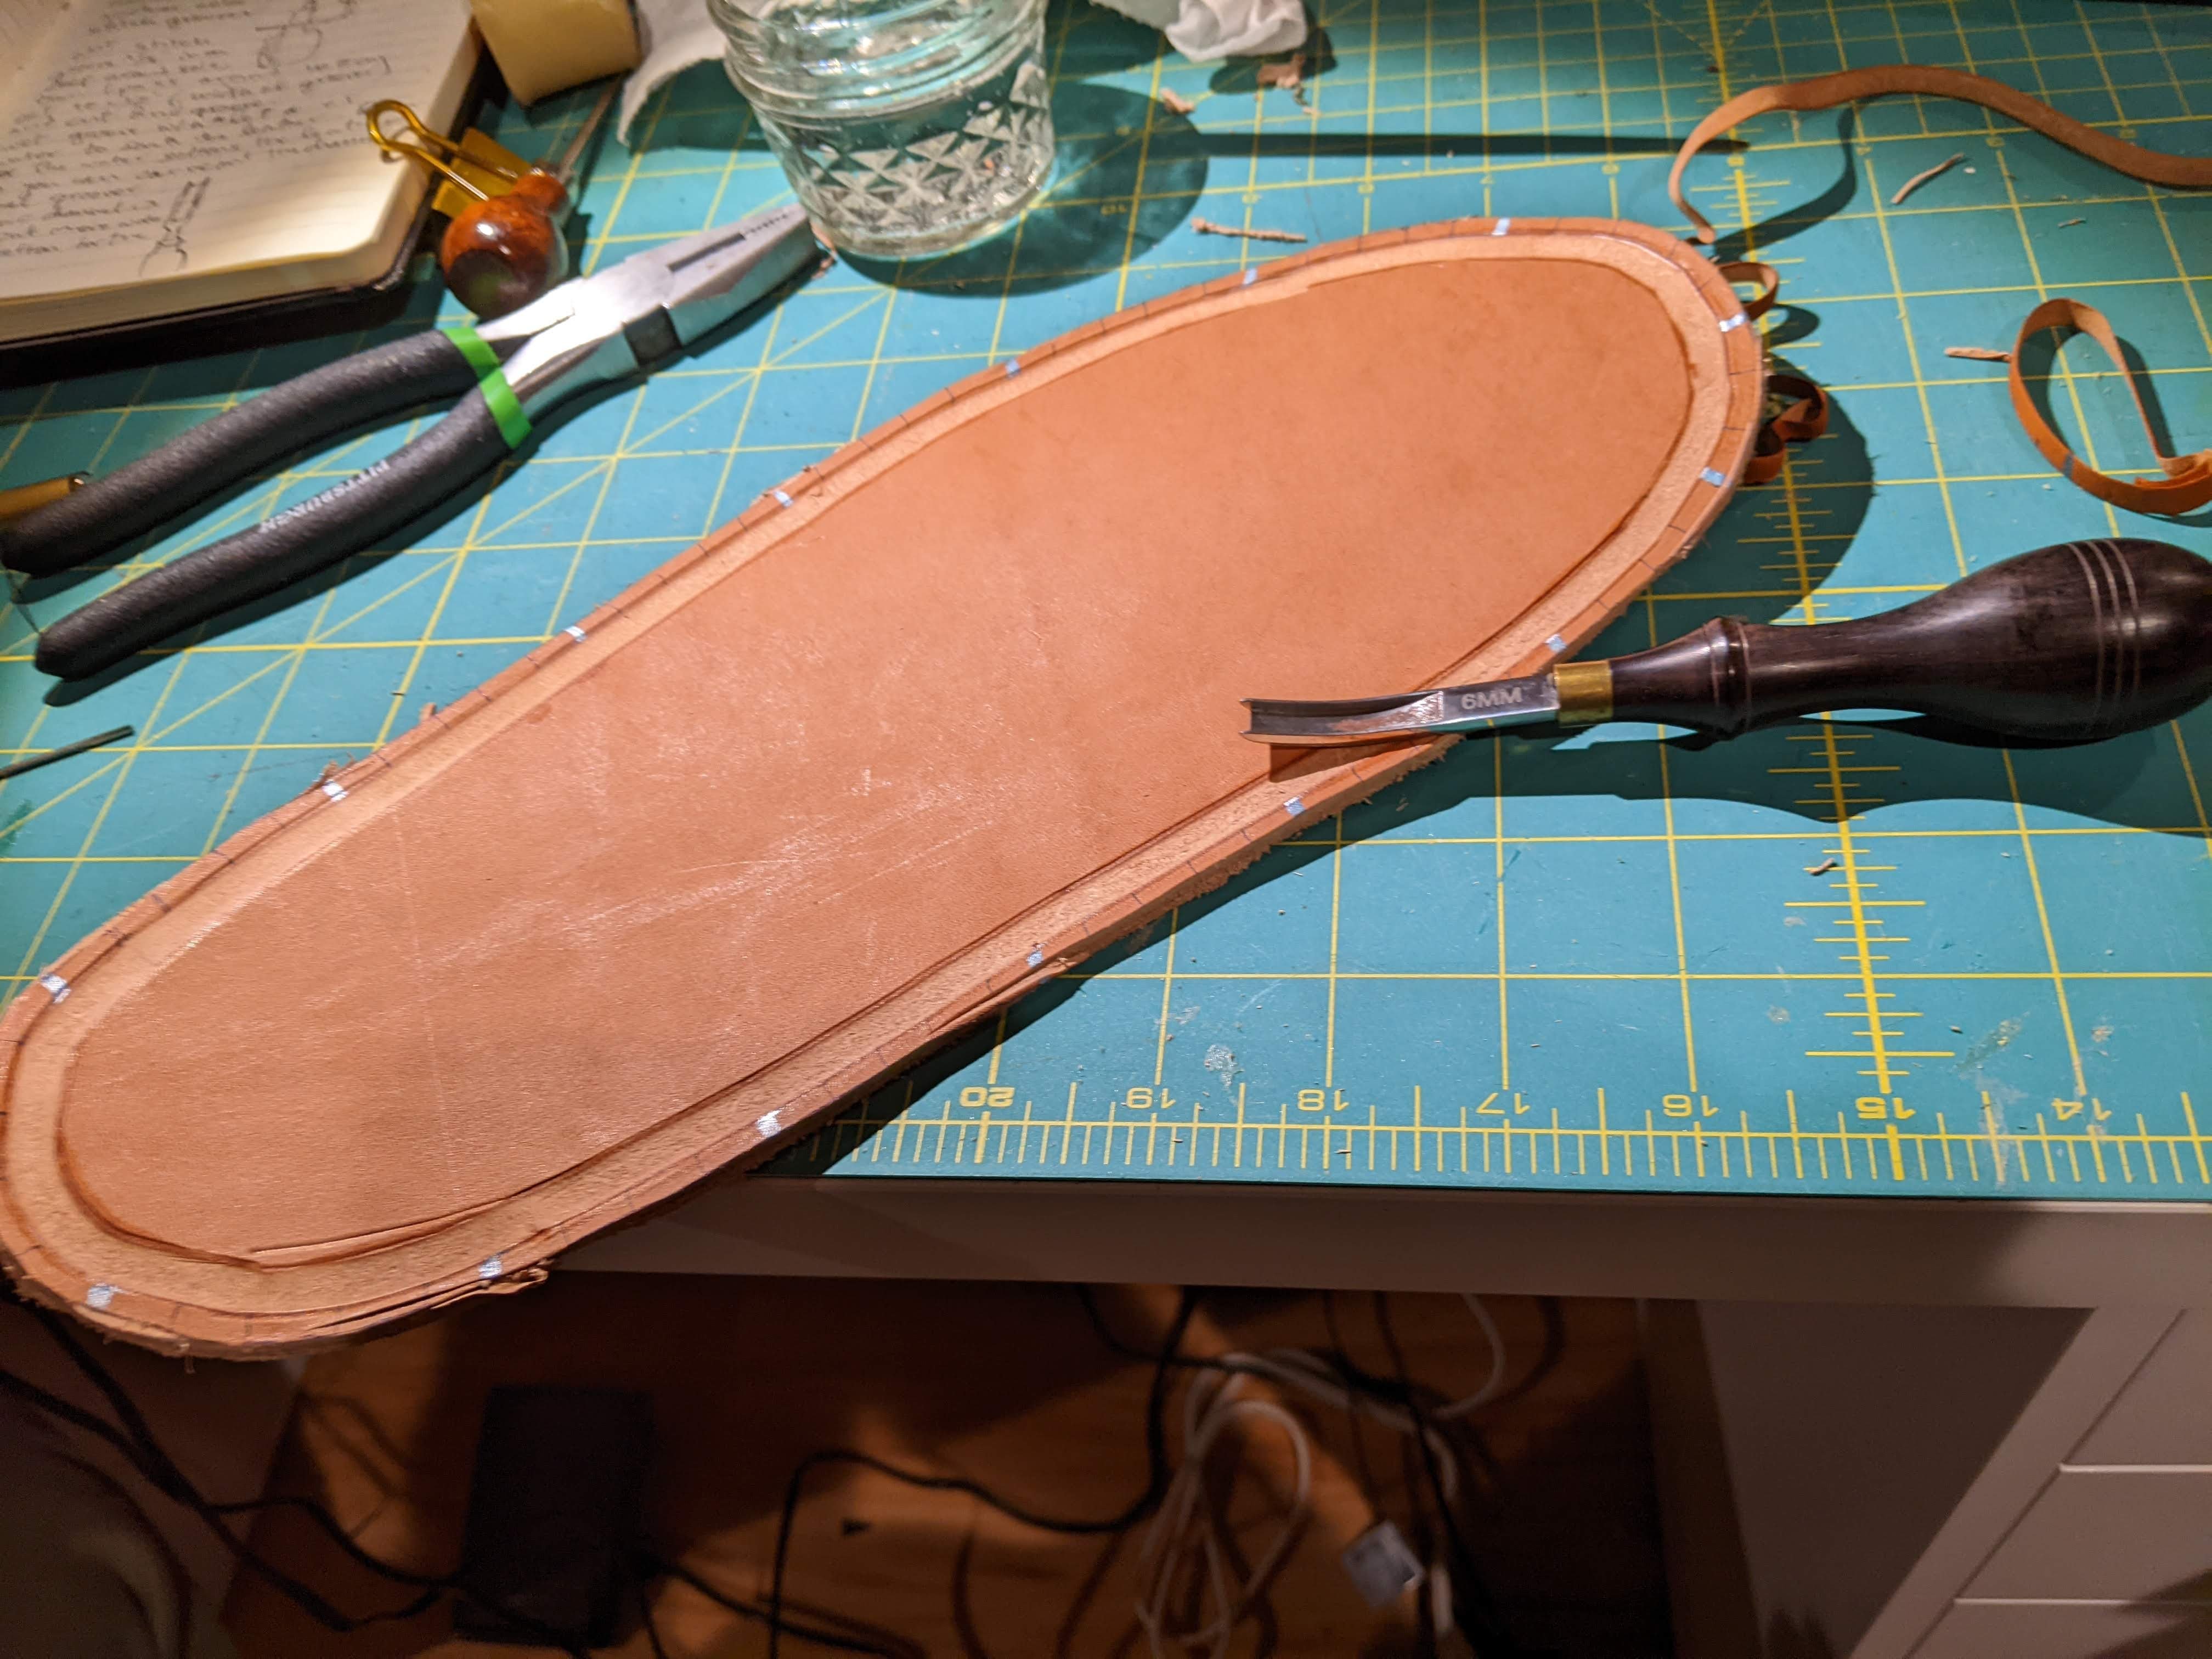
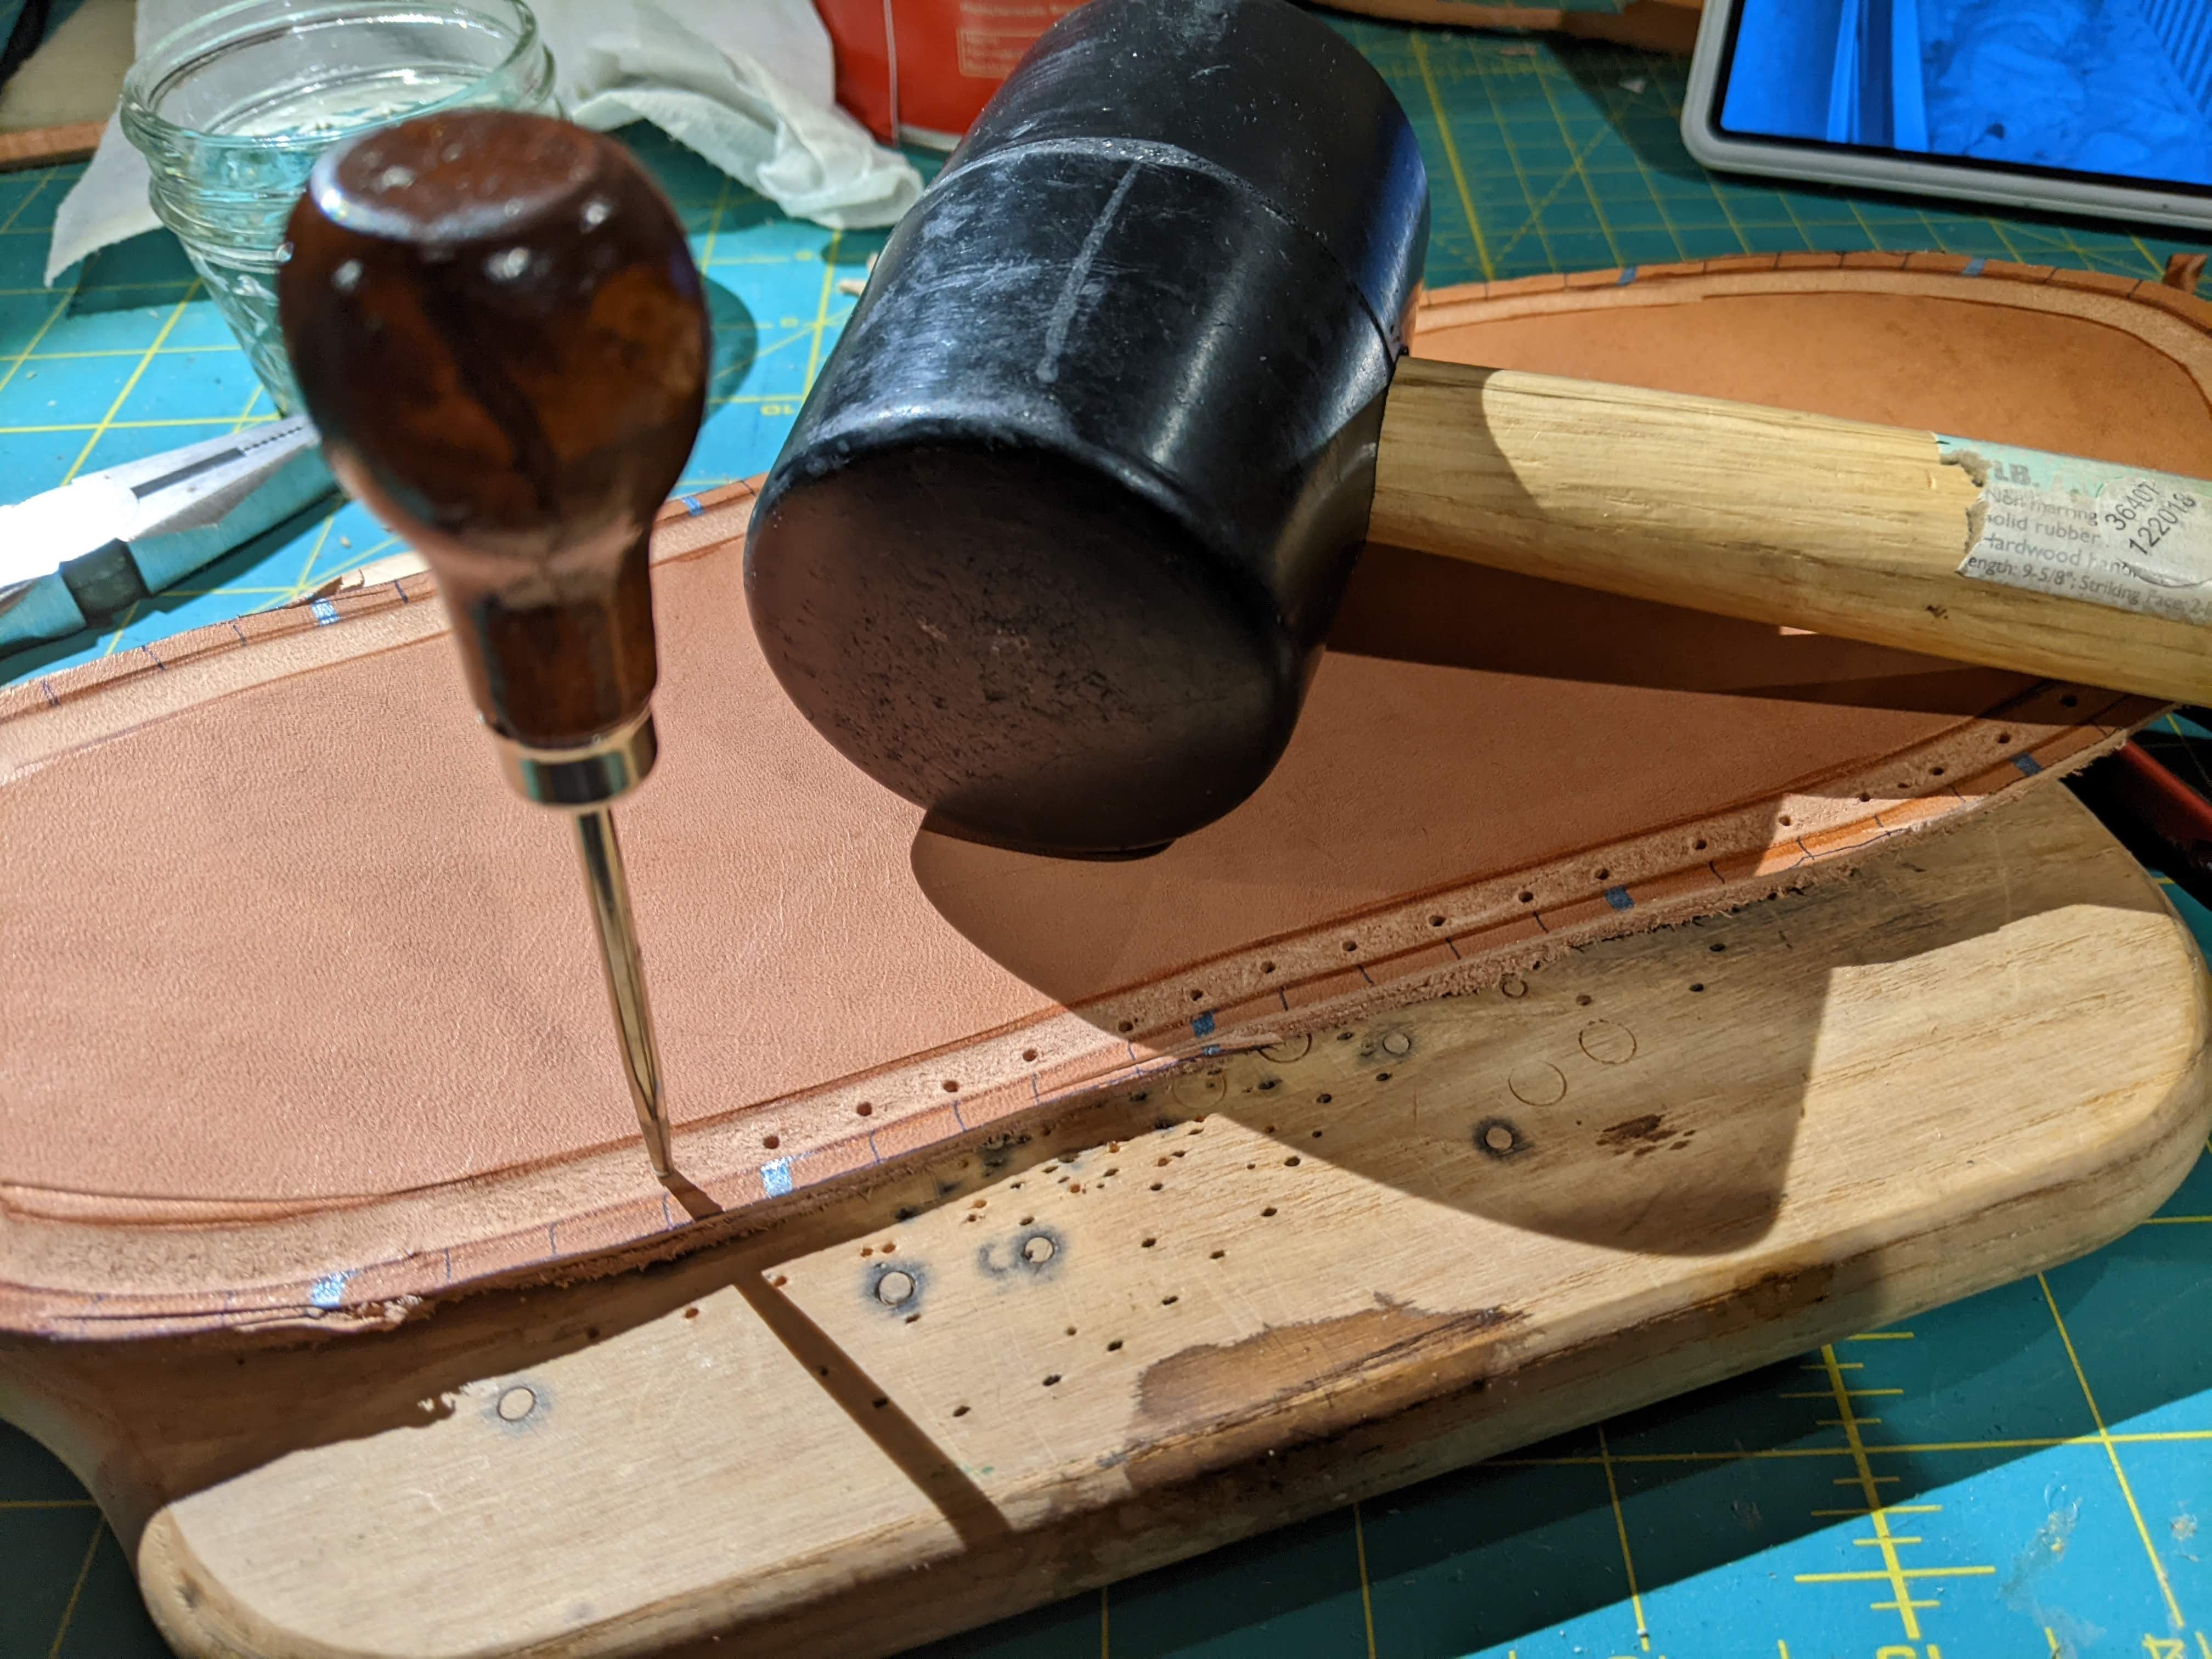
Next holes were punched in the channel where each of the markings were transferred.
Attaching the Upper
Using a heavy wax thread and a special leather awl with a hook at the point, attach the upper to the midsole using a lock stitch.
I started by measuring thread long enough to wrap around the perimeter of the shoe three times. Line up the upper to the midsole using all those registration marks we took such careful care to transfer precisely.
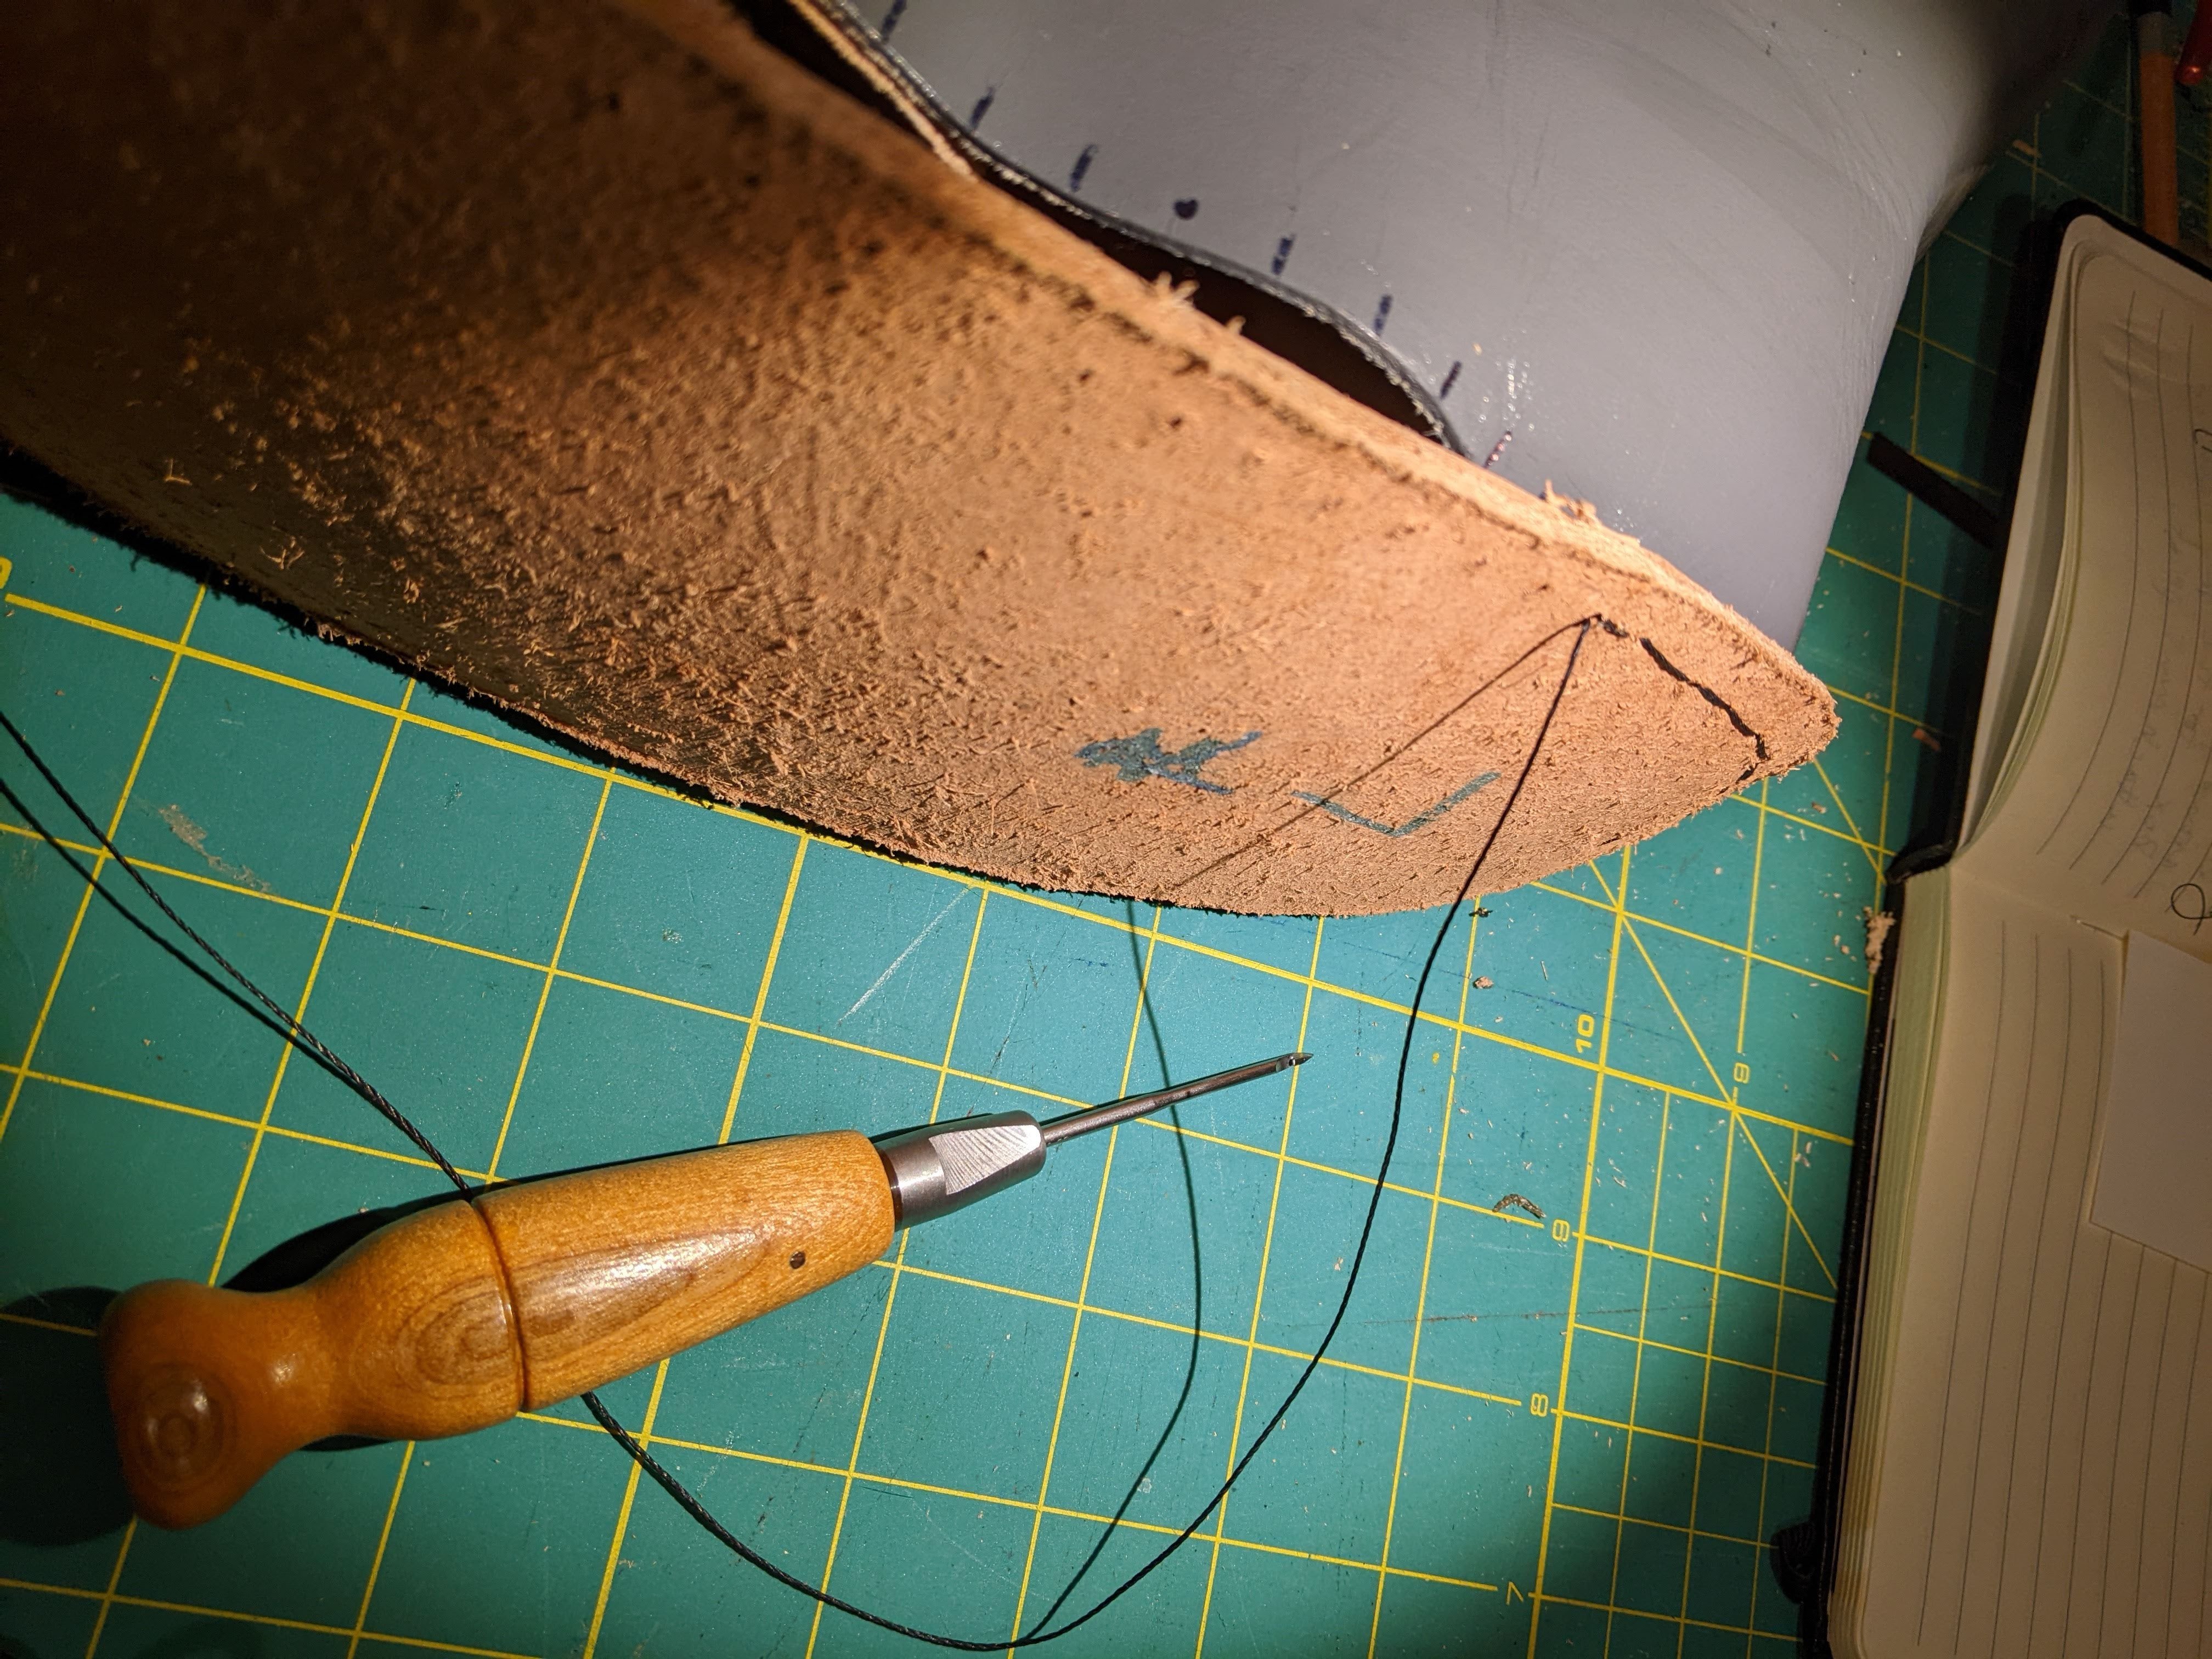
Starting at the back of the shoe, using the awl to pull the thread through the midsole and upper and pull until the thread is an even length inside and outside of the shoe. Since you've already punched the holes in the thick midsole, the awl will just be punching through the upper material which should be softer and easy with a sharp tool. (hey, the tool is really sharp, so watch your fingers during this part!)
Take the awl and punch through the hole next to where the thread was started and use the hook to pull the inner thread through, just a few inches so it makes a loop. Thread the outer half of the thread through this loop and pull tight. You'll want to carefully watch the knot and try to get it to settle right in the middle of the punched hole. Then it's just keep repeating, pulling the thread loop through the next hole with the awl, thread the loop and pull the knot.
As you go along, make sure the seam allowance of the upper is resting tight in that channel that was carved into the midsole.
Oh yeah, I cut out a heel cap out of the same leather used in the upper (no need to paint/dye it) and glued it to the inside of the upper before starting to attach the midsole.

Gloves or some kind of protection for your fingers is highly recommended, so pulling that waxed thread will really start to dig into them.
Getting around the toe will be the most difficult part (esp. if you have big hands). Just go slow and be careful not to poke yourself with the awl.
When you get all the way around where you started, complete the last stitch by pulling the inside thread all the way outside the shoe and tying a regualr square knot.

Straps & Buttons
This is a good point to attach the white elastic and buttons. I used the same black waxed thread for this, but I'll probably go back and redo it with a white or yellow thread.
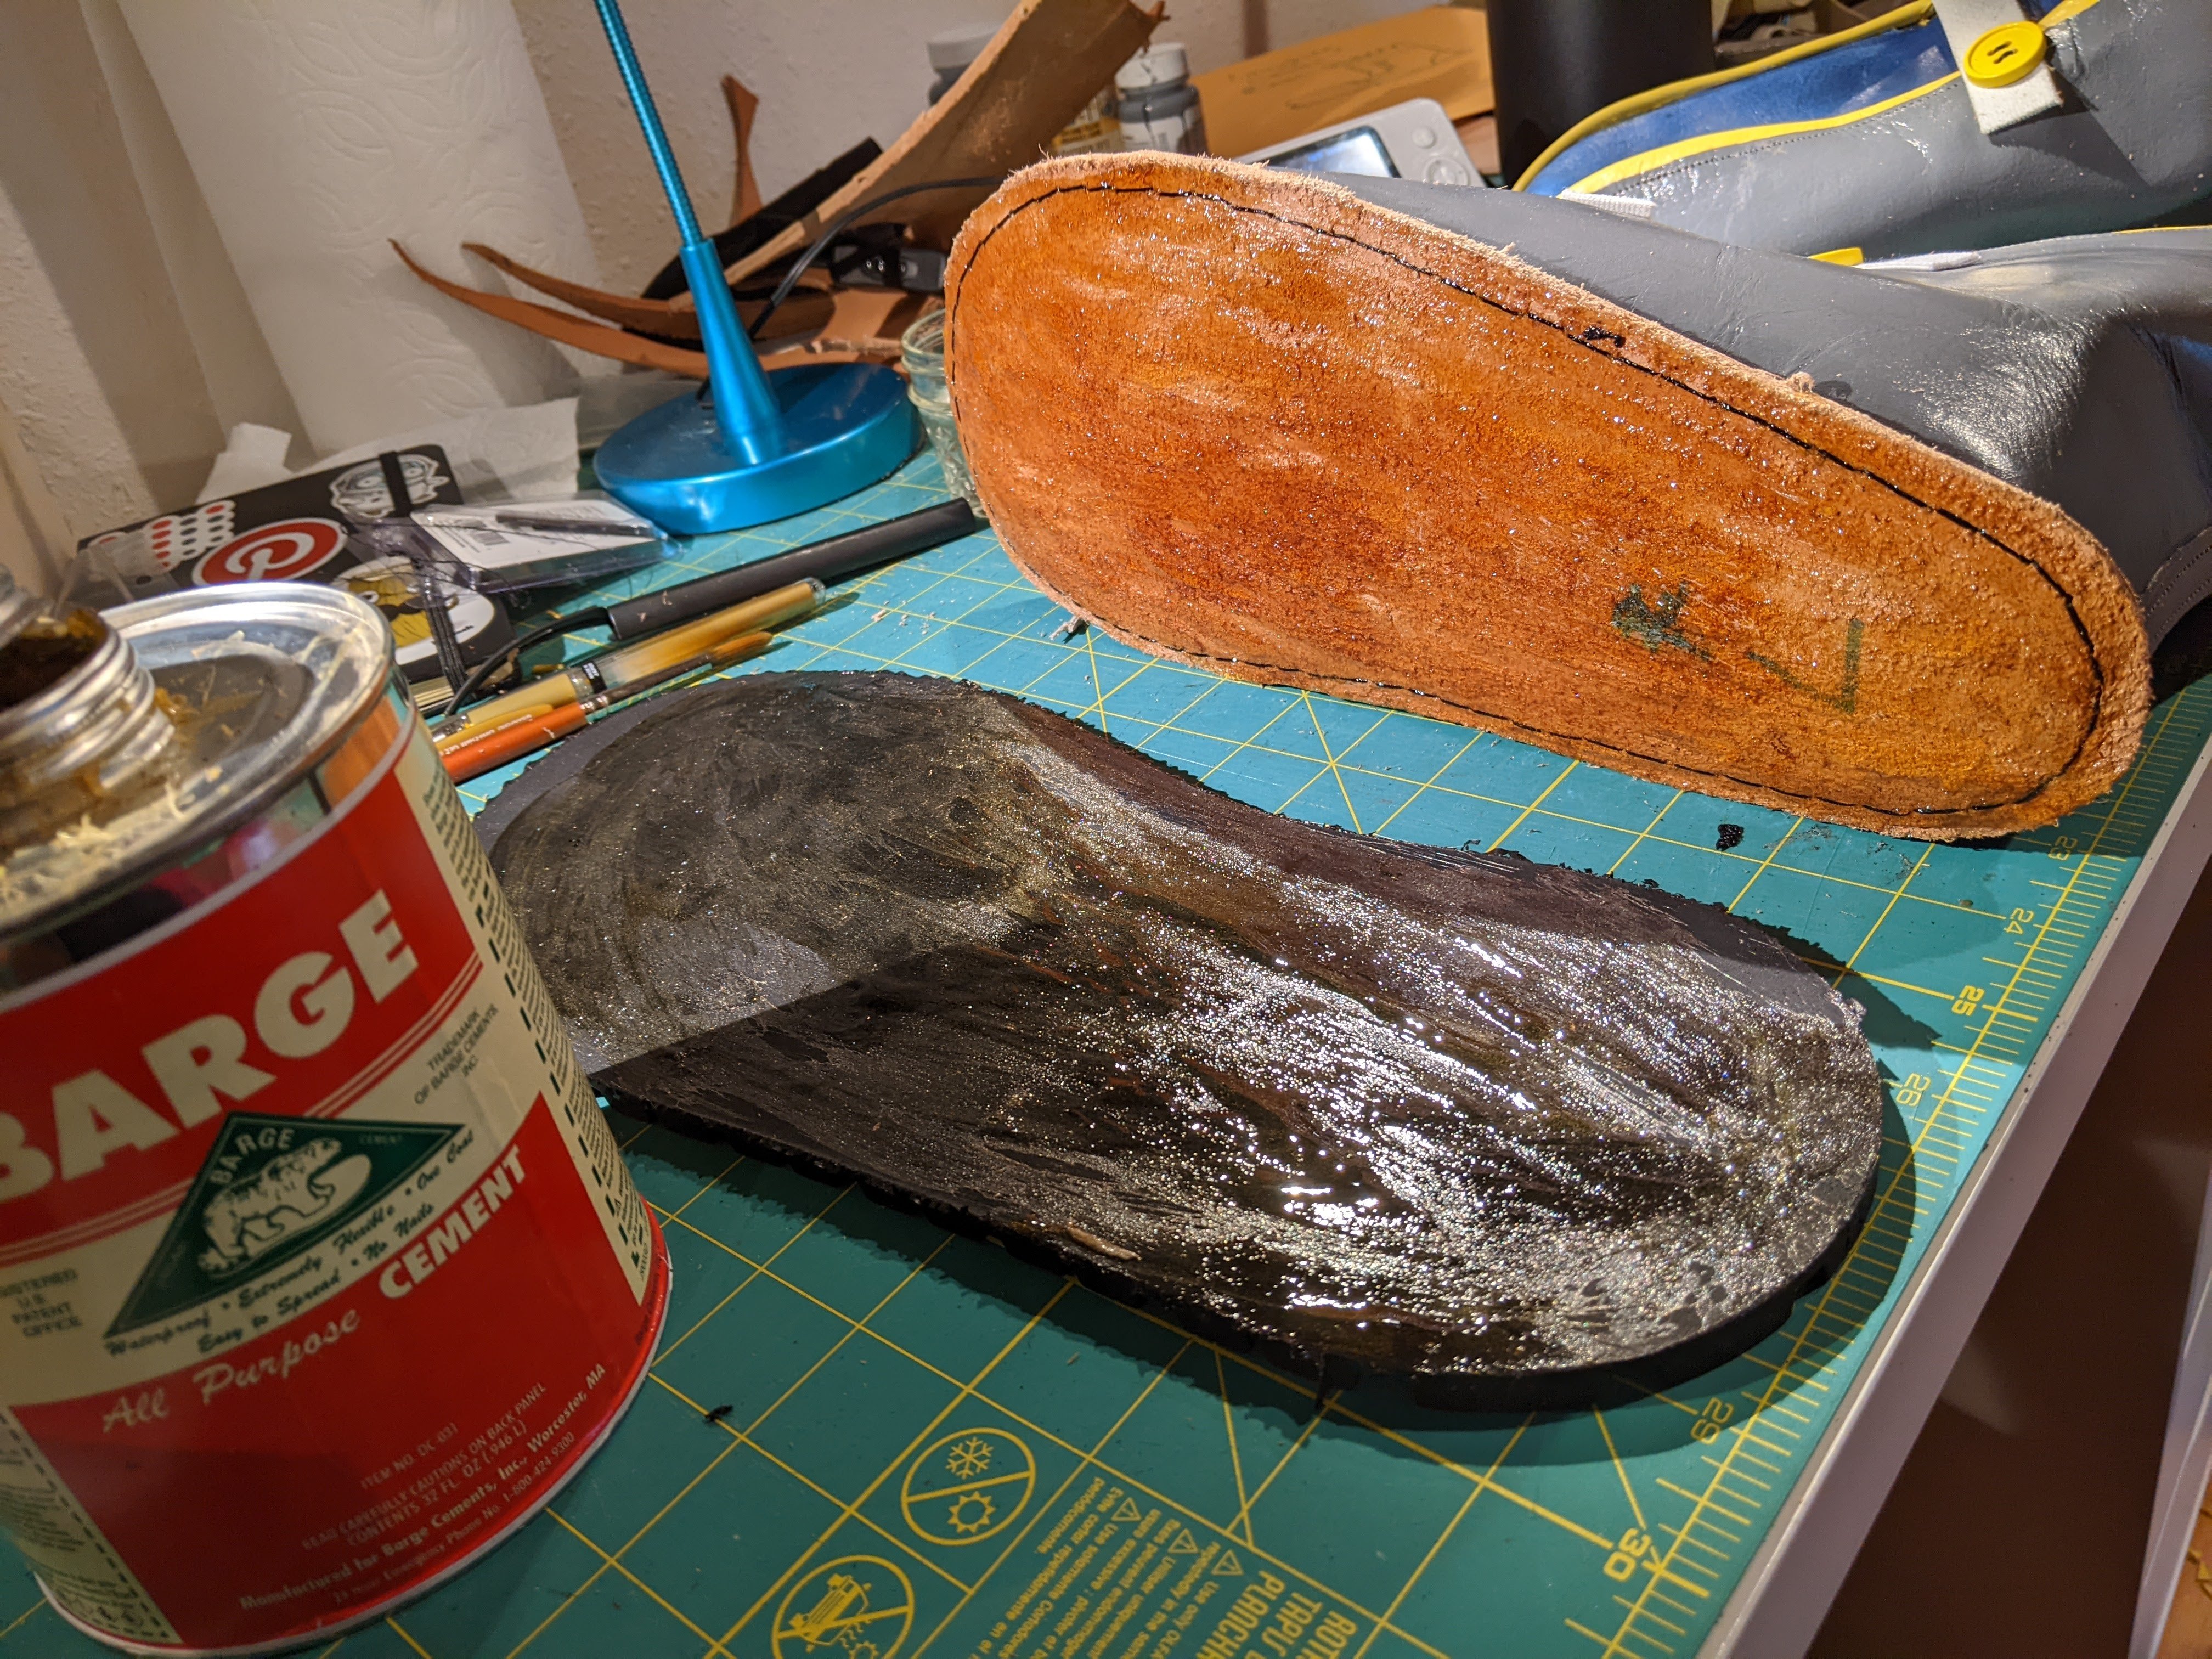
Outer Sole
I used an Vibram outer boot sole. Nothing too complicated here, just apply the Barge all over the midsole and outer sole so it fully covers. Wait until it gets tacky before adhering. I've since learned there's also a technique to let the first layer of glue fully dry, then apply another layer of glue - just so you have glue sticking to more glue, and apparently that works even better.
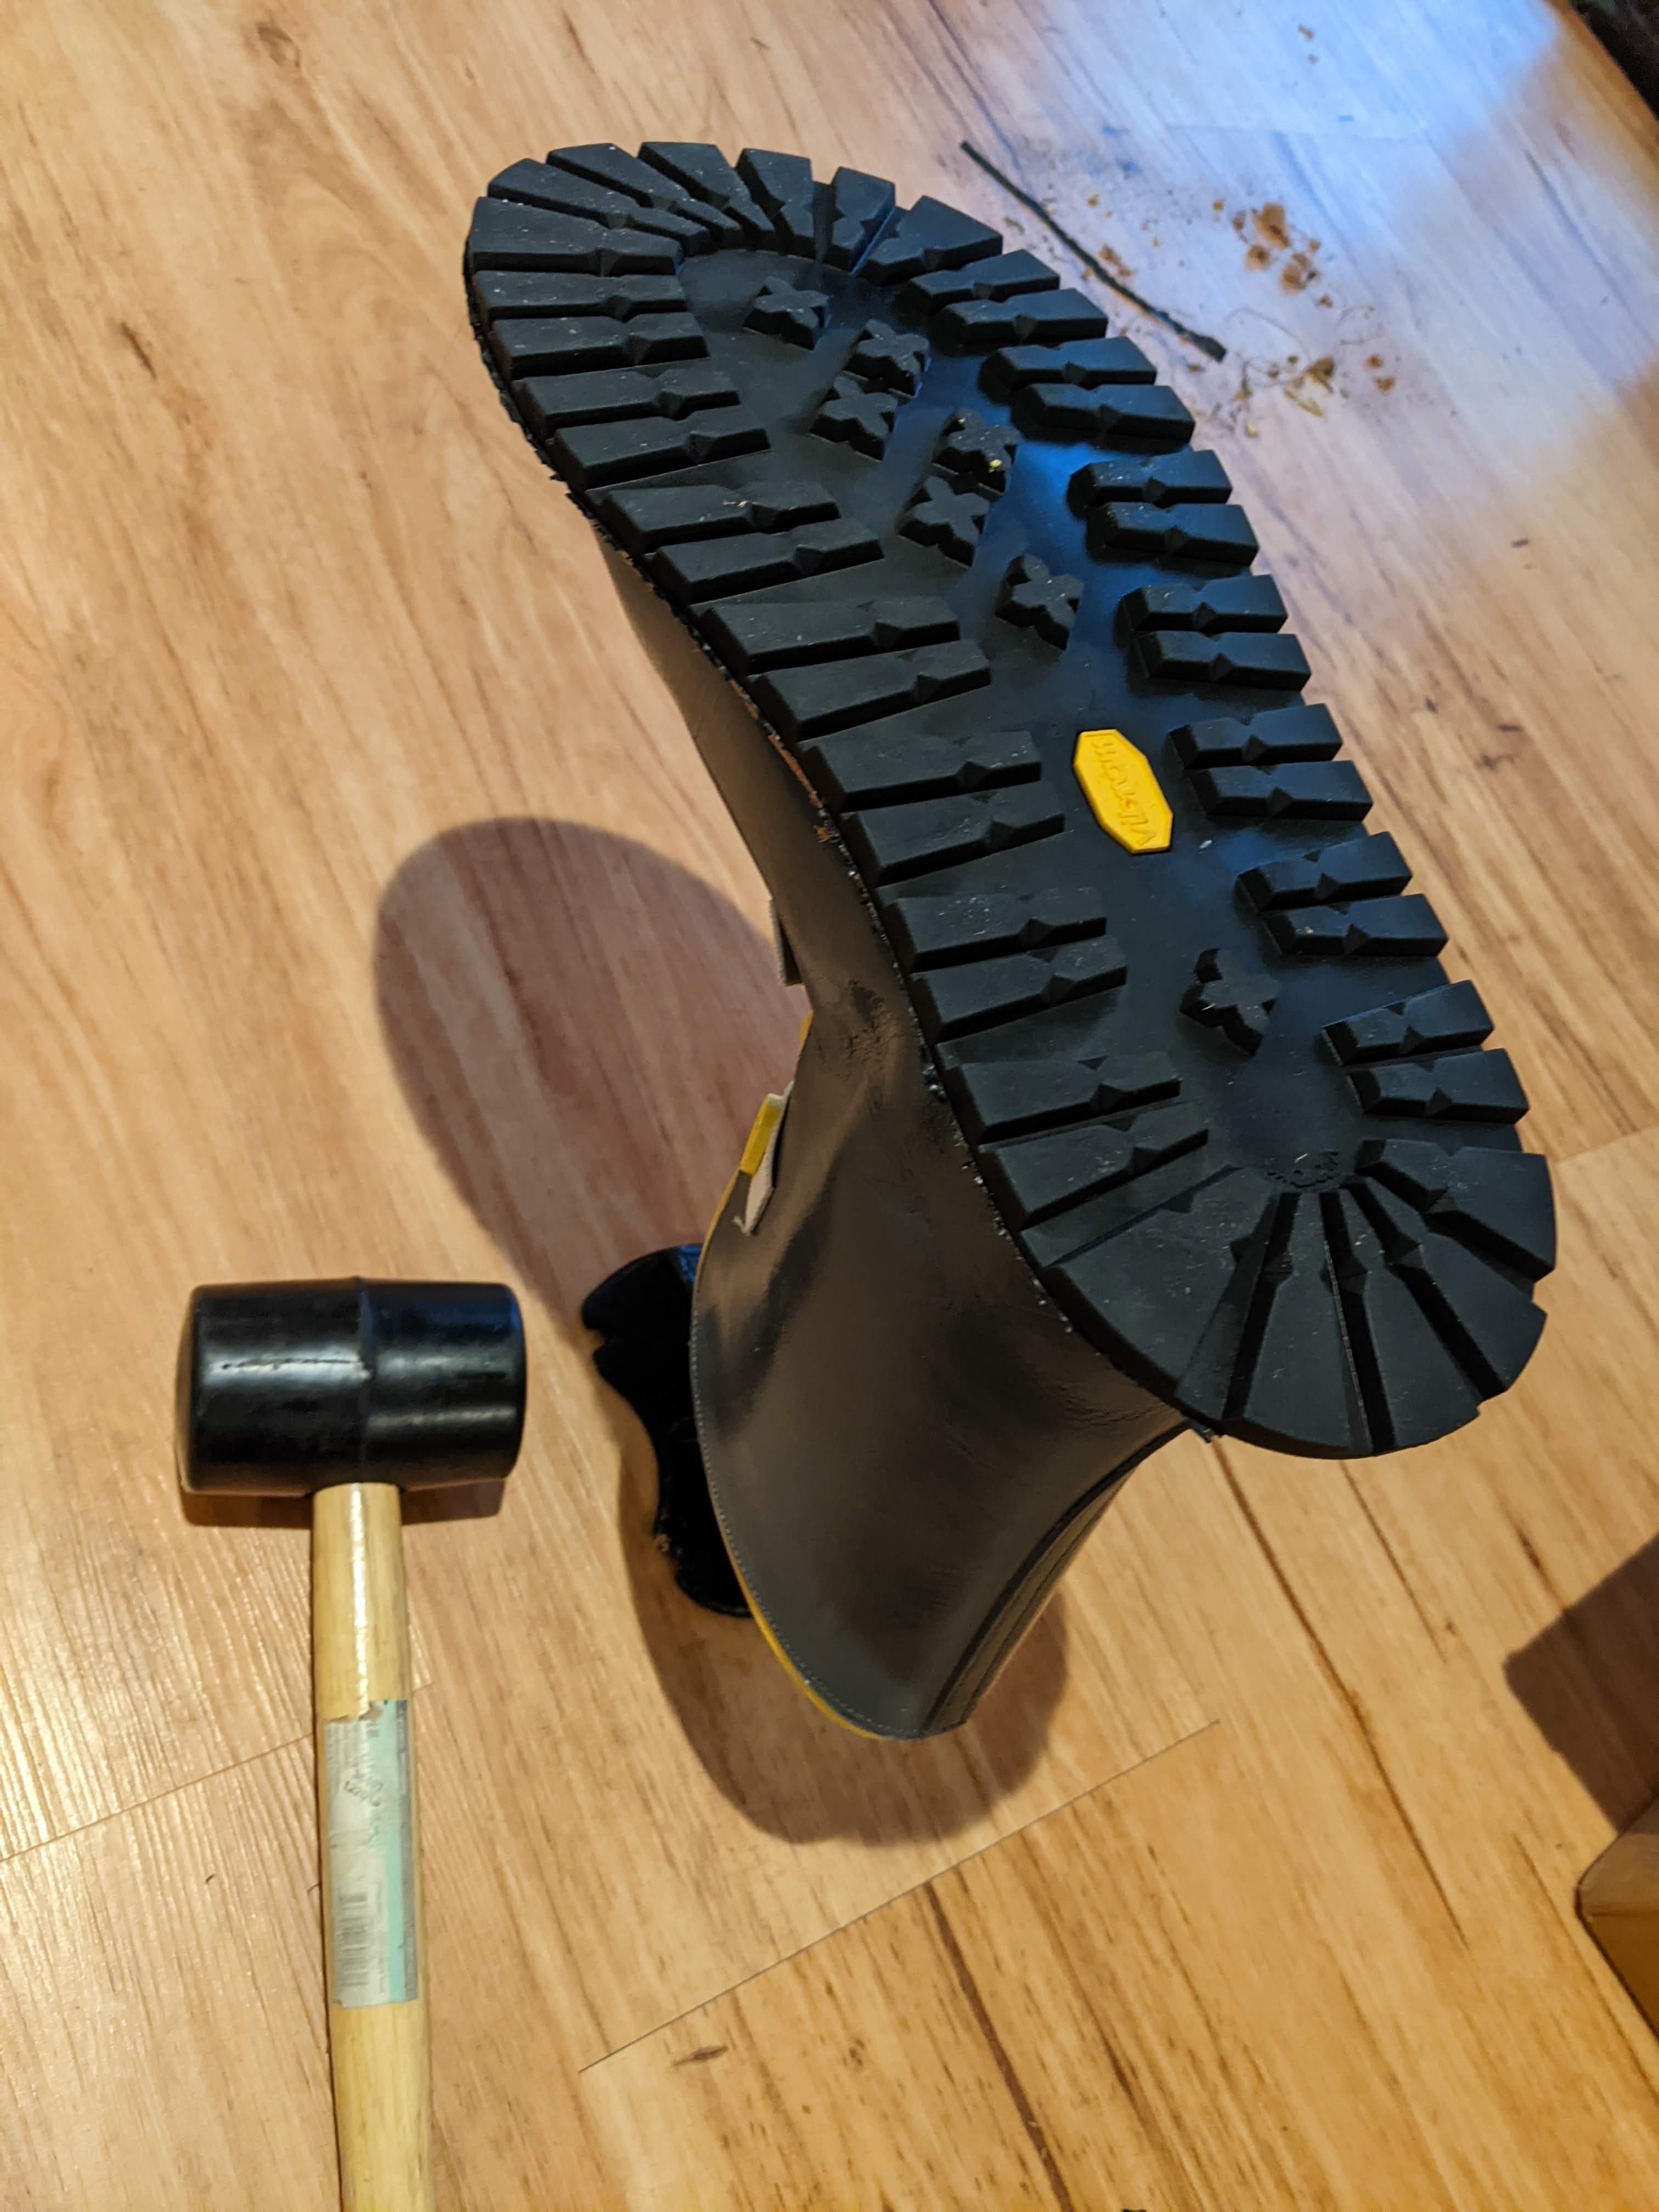
We happen to have a shoe anvil, so after attaching the sole, put the boot on the anvil and just go to town with the rubber mallet. Barge is contact cement, so it works best when there's lots of... contact... so really hammer away.
Let the glue cure for at least 24 hours.
Using a really sharp leather knife, trim off the excess outer sole, going right up to the midsole. You want the cut to be nice and flush for both soles, but you don't really want to cut much into the midsole.
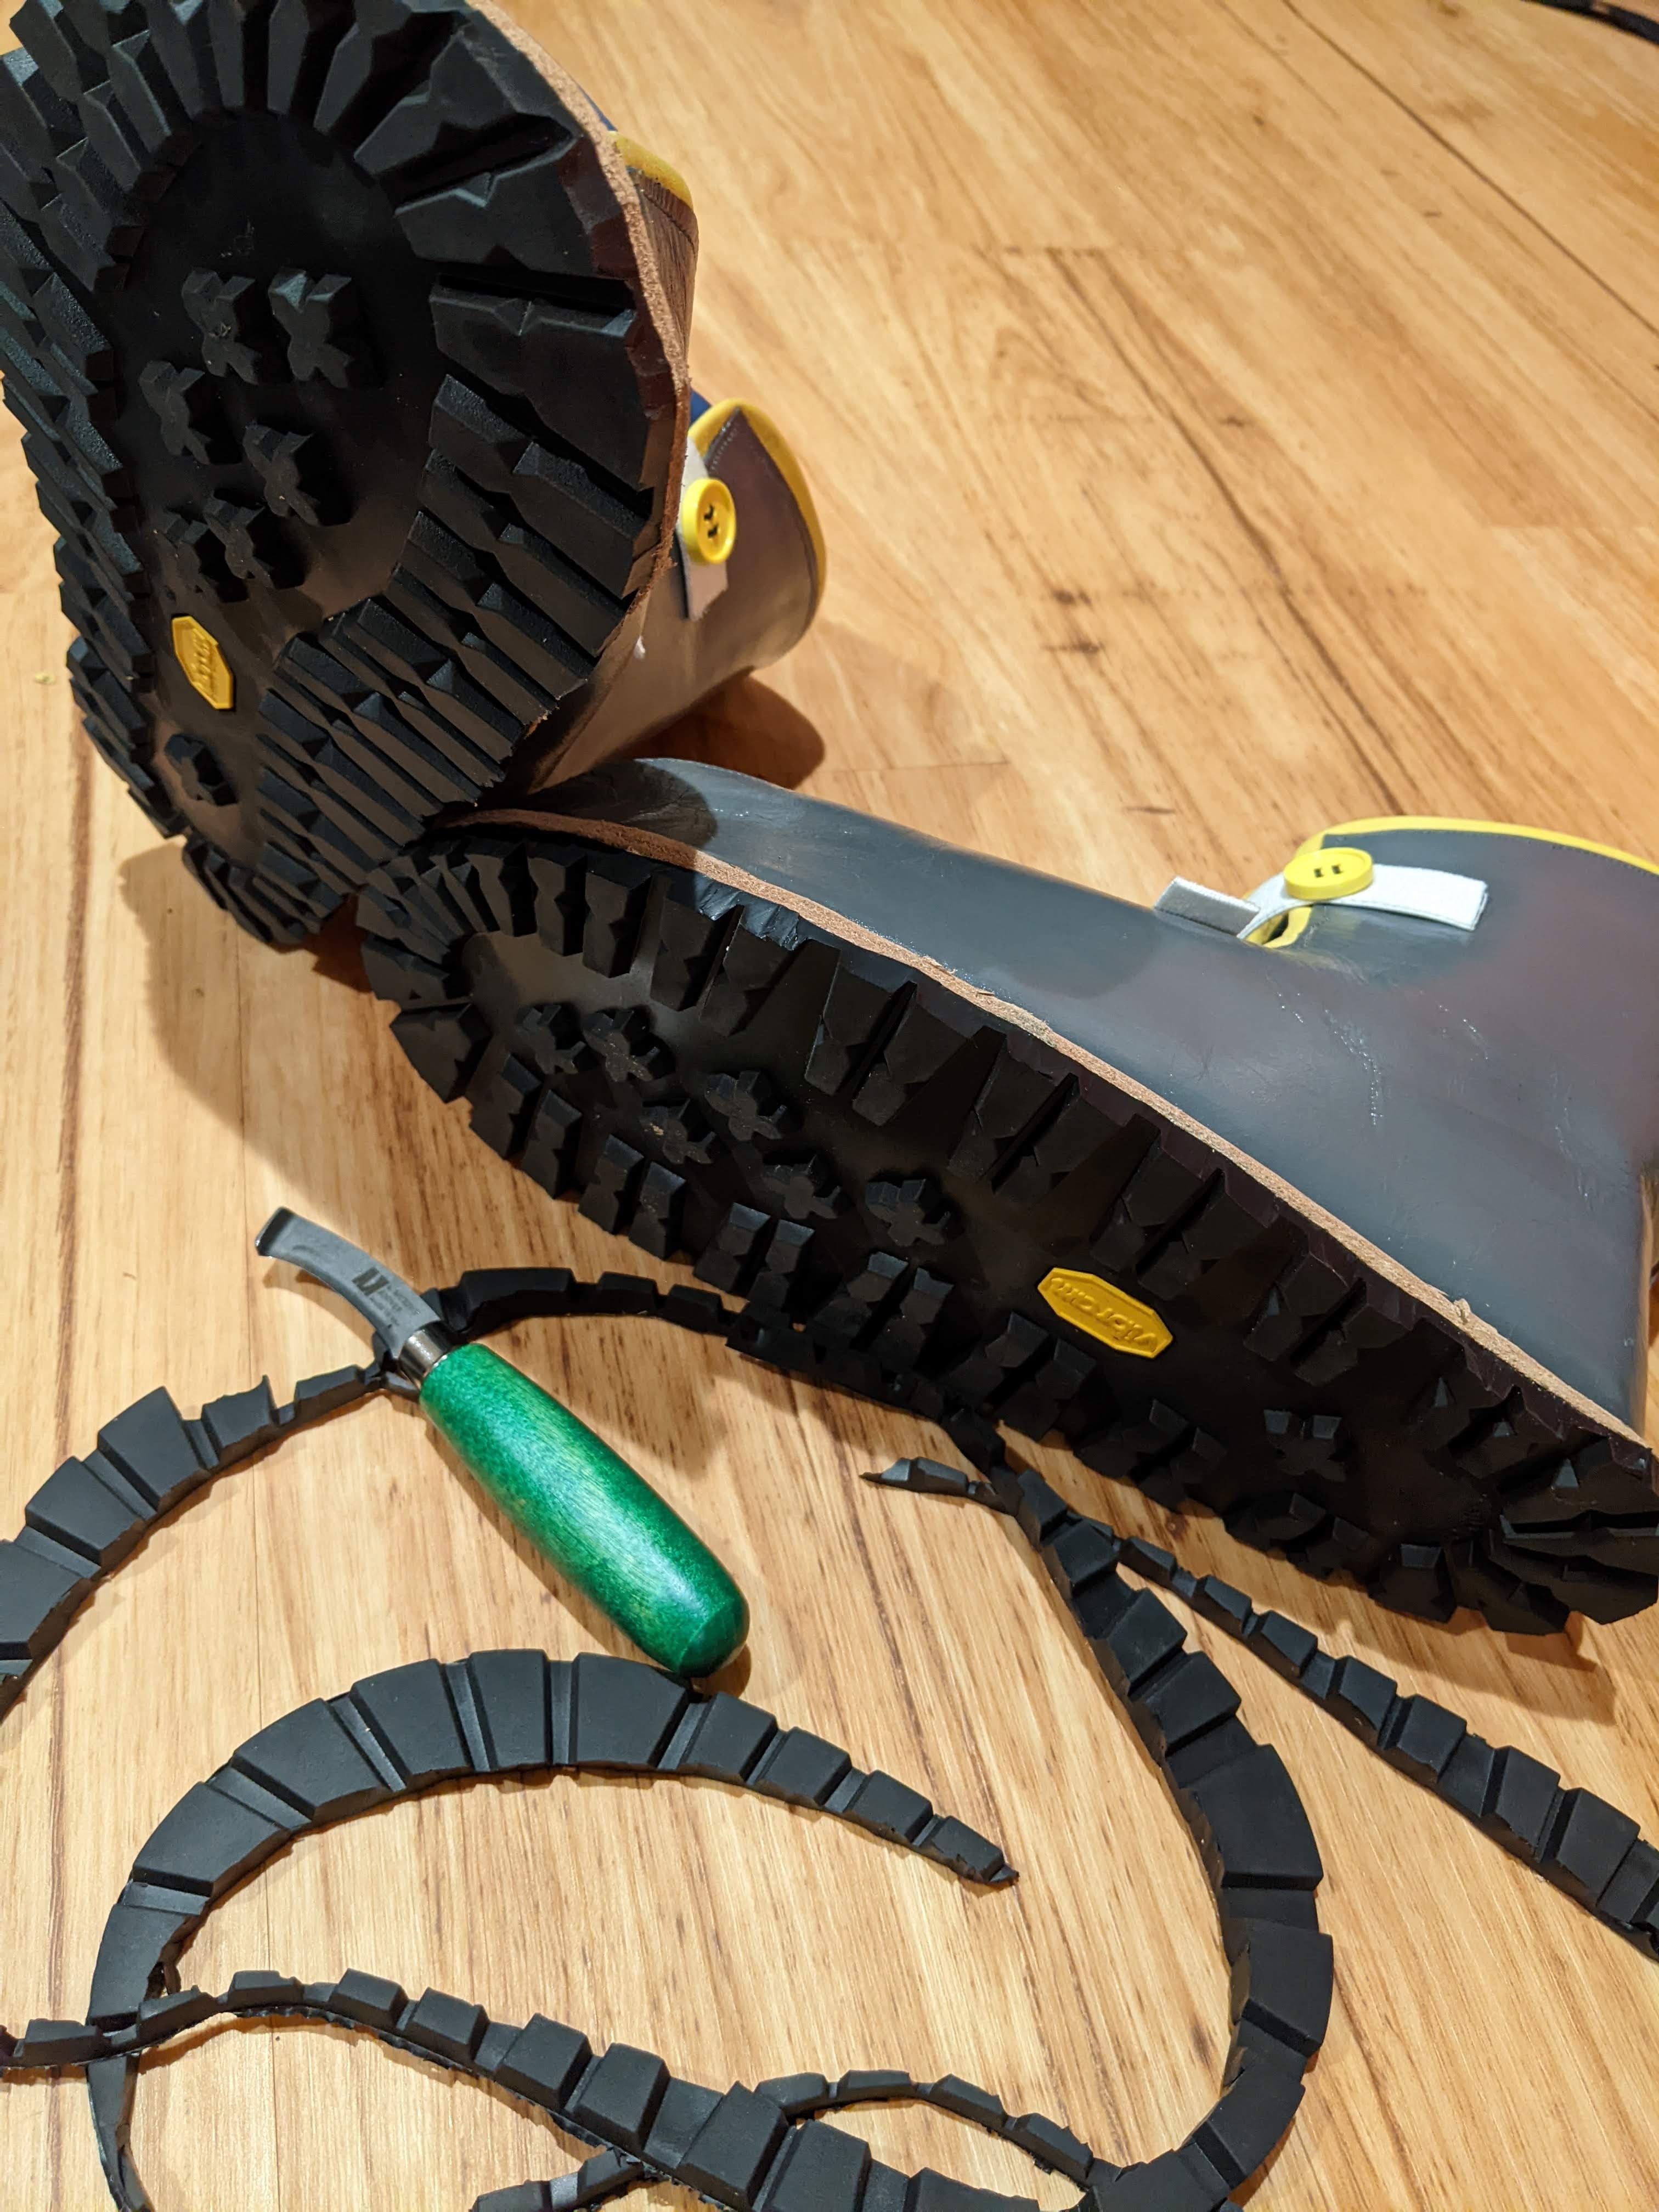
Finally, take some black leather dye and dye the midsole.
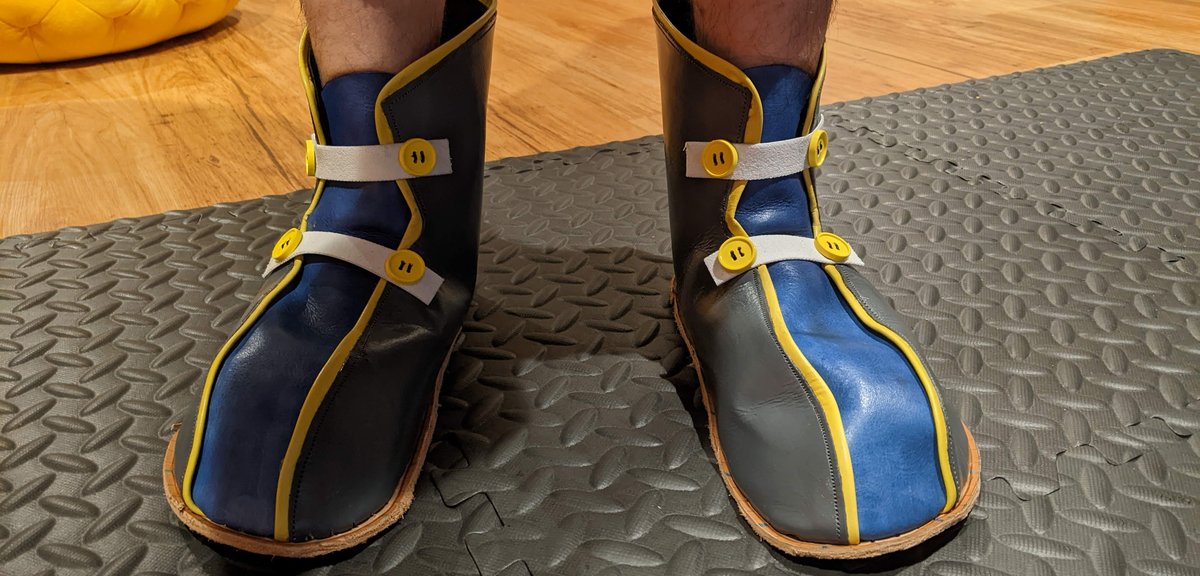
That's it, they're done!
Because I enlarged the pattern a bit around the toe area to fit the design, I added a bit of foam on the inside toe just so they wouldn't move around as much when walking. But overall since the pattern was made off my foot, the fit is pretty good.
Again, this was my first time ever making boots (or shoes), so was certainly a learning experience. Shoe making always seemed to be one of those lost "mystic arts", but seems like recently more craters/makers are getting into it and putting lots of material online for helping people learn. But it certainly wouldn't have been possible without having my wife's guidenace along the way! After that, it's finding the local places in your area that sell the supplies you need or sourcing things off the internet.

nicka
An original digi-destined trapped in the real world. Likes to poke things to try and figure out how they work. Thinks everyone should run their own email server out of their basement.
You Might Also Like
Daisuke/Davis Shoes
Nov. 30, 2022
Neku Sakuraba's Boots - Part 1
Nov. 30, 2022
Lann - World of Final Fantasy
Nov. 30, 2022